First minimal infrastructure: OVH VPS - from order to a hardened server
A VPS (Virtual Private Server) is a small Linux machine in a data center that you rent by the month. It has a public IP address, it runs 24/7, and it is entirely yours to configure. That makes it the perfect place to host a website, a VPN or a CI runner. It also means automated bots will start probing it within minutes of it going online.
This is a good entry point for the rest of the blog articles: we are going to use it as our first minimal infrastructure.
What we will end up with:
- an Ubuntu server,
- login with SSH keys only (no passwords, no root),
- a firewall that blocks everything we did not explicitly open,
- automatic banning of brute-force attempts,
- security updates installed on their own,
- a snapshot to roll back to, and a plan B if we ever lock ourselves out.
Important
Anyone who gets into your OVHcloud account can reinstall your server, read its console or reset its password. A long unique password and 2FA are here for a reason.
Step 0: Order the VPS
First things first, let’s get a VPS on OVH and pick an offer.
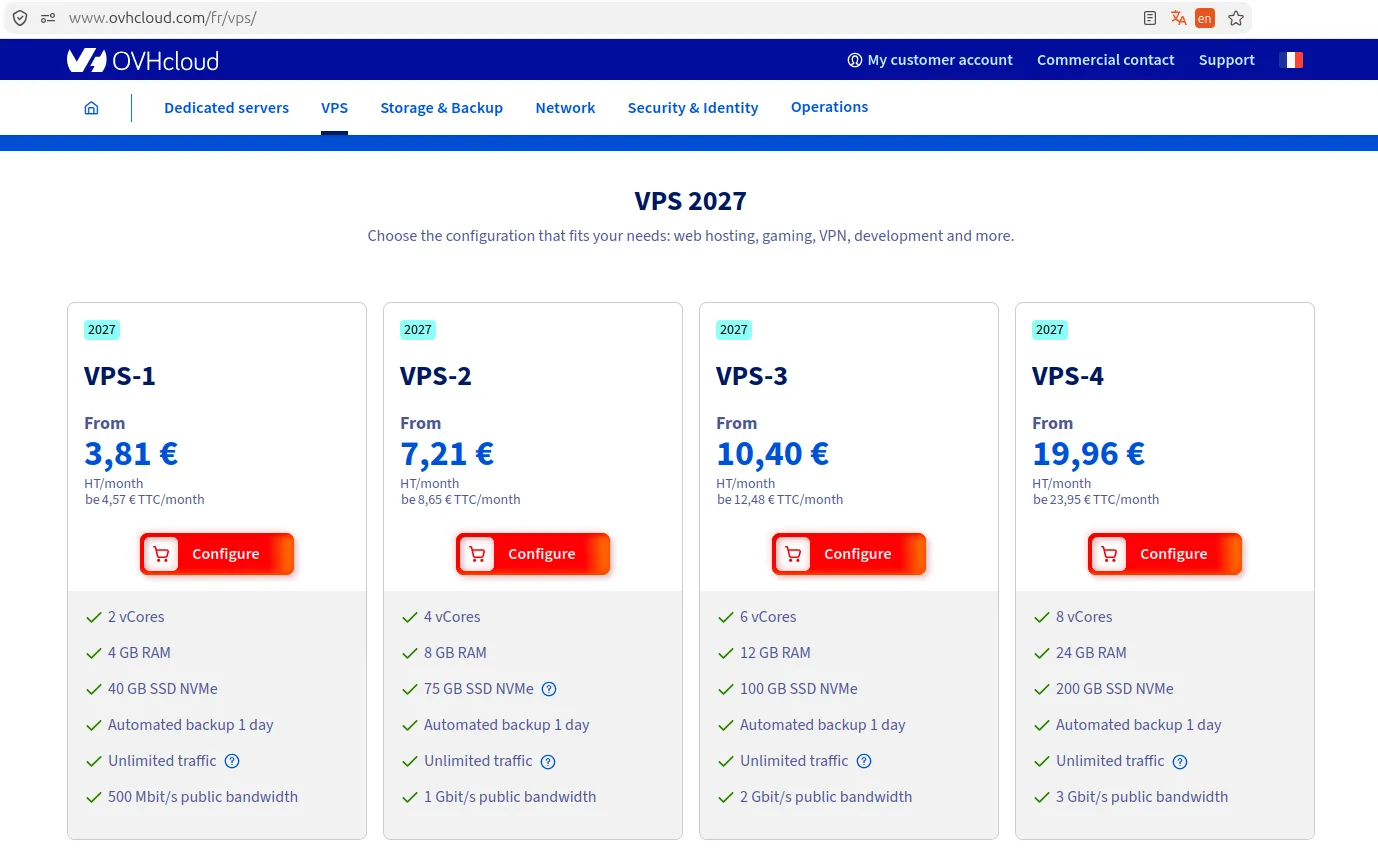
The order form asks for a few things:
- Model: the smallest is good for our initial need, we could upgrade later.
- Location: the data center closest to users / visitors (to avoid latency).
- Operating system: The latest Ubuntu LTS (or Debian) without any pre-installed application (“LTS” = version supported with security updates for 5 years).
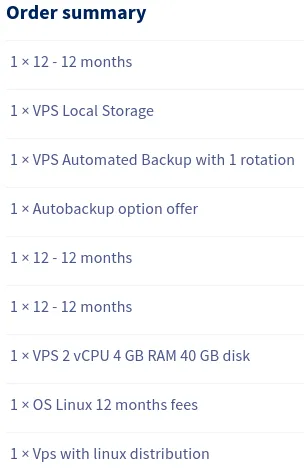
We have now ordered this:
Once the order is ready…

We receive a delivery email with:
- the server’s IPv4 address,
- the username (
ubuntuon Ubuntu,debianon Debian; OVH does not allow directrootlogin), - a link to a temporary password.
Step 1: Set up the VPS
Control Panel
Before anything, even if I am more into terminal than GUI, it is always good to know where to find settings from OVH website.
In the OVHcloud Control Panel → Bare Metal Cloud → Virtual private servers → our VPS → Home tab.
| Where on the Home tab | What it does | When you need it |
|---|---|---|
... next to your VPS name → KVM |
Opens the server’s screen and keyboard in your browser. Works without network or SSH. | You broke SSH or the firewall. |
Boot section → ... → reboot in rescue mode |
Boots a temporary system from which you can mount and repair your disk. | The server does not boot, or you can’t log in even via KVM. |
OS/Distribution section → ... → Reinstall my VPS |
Wipes the server and installs a fresh OS (with an optional SSH key). | Starting over. Destroys all data. |
| Backup area → Snapshot / Automated Backup | Snapshots and daily backups of the whole server. | We will see that later |
First login
Now that we have the VPS IP and temporary password from the delivery email, we can SSH to it:
ssh ubuntu@<vps ip>After confirming the server’s fingerprint and using the temporary password, we define a new password and get logged out.
Tip
If we need to change the password later, we can use sudo passwd ubuntu.
We are going to set up an SSH key for logging in:
# From our computer
# Generate an SSH key pair
ssh-keygen -t ed25519
# Fill up the prompter questions (path, name, passphrase, etc.)

# Copy the pub key into the VPS
ssh-copy-id -i <ssh key path>/<ssh key name>.pub ubuntu@<vps ip>
Now we can log in directly without a password: the SSH key is used from our .ssh folder.
To avoid typing the IP every time, we will define a ~/.ssh/config file on our computer:
Host myvps
    HostName <vps ip>
    User ubuntu
    IdentityFile <ssh key path>/<ssh key name>
From now on, we can login with the alias ssh myvps.
SSH hardening
Right now the server still accepts passwords, which is exactly what bots try to guess. We switch to keys only.
For that we need to define a config file in sshd_config.d/. Those configs are read in alphabetical order, and for SSH settings the first value read wins. So we create our own file with a name that sorts first:
sudo nano /etc/ssh/sshd_config.d/00-hardening.conf# Keys only: no passwords, no keyboard-interactive prompts
PubkeyAuthentication yes
PasswordAuthentication no
KbdInteractiveAuthentication no
# Never log in as root directly; use your user + sudo
PermitRootLogin no
# Fewer attempts per connection, fewer idle half-open logins
MaxAuthTries 3
LoginGraceTime 30
# Features a server rarely needs
X11Forwarding noThen we test and apply:
sudo sshd -t                        # no output = no syntax error
sudo systemctl restart ssh
sudo sshd -T | grep -E "passwordauthentication|kbdinteractive|permitrootlogin|maxauthtries"
# passwordauthentication no
# kbdinteractiveauthentication no
# permitrootlogin no
# maxauthtries 3
We are going to keep this terminal open to be able to revert the change if the config is wrong. With a second terminal, we can try if password authentication is rejected:
ssh -o PubkeyAuthentication=no -o PreferredAuthentications=password myvps
# ubuntu@<vps ip>: Permission denied (publickey).
After confirming the VPS is reachable using the SSH key and password authentication is rejected, we are good to go.
Note
Should I change the SSH port from 22? It reduces log noise from bots, but it is not a security measure: a port scan finds the new port in seconds. With keys only, port 22 is fine.
Update & upgrade
Now that we have secured the login part, let’s update and upgrade the system before going further:
sudo apt update && sudo apt full-upgrade -y
sudo reboot            # if a new kernel was installed; reconnect after ~30 s
Step 2: Secure the VPS
Firewall (ufw)
A firewall decides which network traffic may reach the server. The safe policy is: deny
everything incoming, then open only what we use. Ubuntu includes ufw
(“uncomplicated firewall”), a friendly front end to the kernel’s firewall.
Warning
The order of these commands matters. Allow SSH before enabling the firewall, or you will lock yourself out of the server.
Let’s do:
sudo ufw default deny incoming
sudo ufw default allow outgoing
# sudo ufw allow <port number>/<protocol> for any other port we need
sudo ufw allow OpenSSH          # = 22/tcp
sudo ufw enable                 # answer "y"
sudo ufw status verbose
We should see something like:
Status: active
Default: deny (incoming), allow (outgoing), disabled (routed)
To                         Action      From
--                         ------      ----
22/tcp (OpenSSH)           ALLOW IN    Anywhere
22/tcp (OpenSSH (v6))      ALLOW IN    Anywhere (v6)
The (v6) lines matter: the VPS has an IPv6 address too, and ufw covers it by default.
We can open a new SSH session again to confirm we can still get in (if stuck, check this section).
Later, when we will install a service, we will open exactly its port and nothing else. For example,
for a website: sudo ufw allow 80/tcp && sudo ufw allow 443/tcp.
Optional: OVH’s Edge Network Firewall
OVH also offers a firewall that runs in their network, before traffic reaches our
VPS, and works together with their anti-DDoS system. We can configure it in Network →
Public IP Addresses → ⁝ next to our IPv4 → Configure Edge Network Firewall, with
up to 20 rules per IP.
It’s a useful extra layer, but it’s not a replacement for ufw, for two reasons:
- It is configured per IPv4 address, while ufw covers IPv4 and IPv6 alike.
- It is stateless: it doesn’t know which packets are replies to connections our server
opened. A careless rule set breaks things like
apt update.
If you use it, follow OVH’s recommended shape:
| Priority | Action | Protocol | Options |
|---|---|---|---|
| 0 | Accept | TCP | established (replies to connections the server opened) |
| 1 | Accept | TCP | destination port 22 (plus 80/443 if you host a site) |
| 2 | Accept | UDP | source port 53 (DNS replies) |
| 3 | Accept | ICMP | |
| 19 | Refuse | IPv4 | everything else |
As OVH’s documentation puts it, a rule set made only of Accept rules does nothing. The final Refuse is what does the work (Edge Network Firewall guide).
fail2ban, to ban brute-force attempts
Even with passwords disabled, bots will keep knocking on port 22. fail2ban watches the
logs and temporarily bans IPs that fail to log in too many times. It won’t stop a
determined attacker (keys already do that), but it cuts the noise and the wasted CPU.
sudo apt install -y fail2ban python3-systemd
sudo nano /etc/fail2ban/jail.local
With this jail.local content:
[DEFAULT]
# Ban for 1 hour after 5 failures within 10 minutes;
# repeat offenders get longer and longer bans.
bantime  = 1h
findtime = 10m
maxretry = 5
bantime.increment = true

[sshd]
enabled = true
# Read SSH failures from the systemd journal
backend = systemd
Launch the fail2ban service:
sudo systemctl enable --now fail2ban
sudo systemctl restart fail2ban
sudo fail2ban-client status sshd
Tip
Come back after a day and look at Total banned. It is an eye-opener. If you ever ban
yourself, log in through the KVM console (or from another IP) and run
sudo fail2ban-client set sshd unbanip <your-ip>.
Automatic security updates
Most compromised servers are not hacked with clever exploits. They run software with a
vulnerability that was fixed months ago. Ubuntu can install security updates on its own
with unattended-upgrades. Make sure it is installed and on:
sudo apt install -y unattended-upgrades
sudo dpkg-reconfigure -plow unattended-upgrades     # answer "Yes"
cat /etc/apt/apt.conf.d/20auto-upgrades
# APT::Periodic::Update-Package-Lists "1";
# APT::Periodic::Unattended-Upgrade "1";
Kernel updates only take effect after a reboot. If you’re fine with the server rebooting by itself at night when needed, add:
sudo tee /etc/apt/apt.conf.d/52unattended-upgrades-local <<'EOF'
Unattended-Upgrade::Automatic-Reboot "true";
Unattended-Upgrade::Automatic-Reboot-Time "04:00";
EOF
Test the setup without installing anything:
sudo unattended-upgrade --dry-run --debug | tailKernel network settings (optional but cheap)
A few kernel settings make the network stack less gullible: ignore ICMP redirects and source-routed packets that no normal server should accept, log impossible (“martian”) source addresses, and keep SYN-flood protection on.
sudo nano /etc/sysctl.d/99-hardening.conf# SYN flood protection
net.ipv4.tcp_syncookies = 1
# Drop packets whose source address could not be routed back through the
# interface they arrived on (anti-spoofing).
net.ipv4.conf.all.rp_filter = 1
net.ipv4.conf.default.rp_filter = 1
# Don't accept or send ICMP redirects, don't accept source-routed packets
net.ipv4.conf.all.accept_redirects = 0
net.ipv4.conf.default.accept_redirects = 0
net.ipv6.conf.all.accept_redirects = 0
net.ipv6.conf.default.accept_redirects = 0
net.ipv4.conf.all.send_redirects = 0
net.ipv4.conf.all.accept_source_route = 0
net.ipv6.conf.all.accept_source_route = 0
# Log packets with impossible source addresses
net.ipv4.conf.all.log_martians = 1
# Ignore broadcast pings
net.ipv4.icmp_echo_ignore_broadcasts = 1
# Hide kernel pointers and the kernel log from non-root users
kernel.kptr_restrict = 2
kernel.dmesg_restrict = 1sudo sysctl -p /etc/sysctl.d/99-hardening.confNote
If you later turn this VPS into a VPN gateway or router (WireGuard, Tailscale exit node…),
you’ll enable net.ipv4.ip_forward, and may need to relax rp_filter to 2 (loose) for
asymmetric routes.
Step 3: Recover the VPS
Backups & snapshots
Security also means recovering from mistakes, mine included. Now that the server is clean and hardened, it is the ideal moment for a restore point:
- Snapshot: Control Panel → our VPS → Home → Backup area → Snapshot → order one. It’s a one-click rollback of the whole disk, perfect before any risky change, but it is additional fees.
- Automated Backup: in the same area, the daily backup option keeps restore points without you thinking about it. It is normally included without additional costs.
Both live at OVH. For data we can’t afford to lose (databases, uploads), we can keep a copy
somewhere else, for example with restic or borg to another provider or to a machine
at home.
If you lock yourself out
It happens to everyone once. In order of preference:
- Another session is still open? Use it to undo the last change.
- KVM console: Control Panel → VPS →
...→ KVM. You get the login prompt in the browser, no network needed. Log in with your user’s password (the one you set at first login: this is why you keep it, even though SSH no longer accepts it). Then fix the file, or runsudo ufw disableto get back in and fix things calmly. - Rescue mode: Boot section → reboot in rescue mode. OVH emails you credentials for a
temporary system. Mount your disk (
lsblk, thenmount /dev/sdb1 /mnt; check the device name withlsblk) and edit/mnt/etc/ssh/sshd_config.d/00-hardening.confor/mnt/etc/ufw/ufw.conf(ENABLED=no). Reboot normally afterwards. OVH’s rescue mode guide walks through it. - Snapshot: restore from a backup / snapshot.
The final checklist
We will run this now, and again every few months:
sudo sshd -T | grep -E "passwordauthentication|permitrootlogin"   # both "no"
sudo ufw status verbose                                           # deny incoming, only your ports
sudo ss -tulpn                                                    # nothing listening you don't know
sudo fail2ban-client status sshd                                  # jail active
cat /etc/apt/apt.conf.d/20auto-upgrades                           # both "1"
last -n 10                                                        # recent logins: all you?
Let’s also go through this checklist:
- 2FA on the OVHcloud account
- SSH key with a passphrase; private key only on your computer
- Password and root login disabled, verified with
sshd -T - ufw active: deny incoming, SSH allowed, IPv6 covered
- fail2ban
sshdjail running - Unattended security upgrades on
- A snapshot of the clean, hardened server
- We know where KVM and rescue mode are
Ok, we now have a minimal infrastructure ready and secure for this blog and associated experiments!
Where this post fits
This post, its tags, and everything they connect to. Open the full graph →
Nothing to map yet — tag a post, or link two posts together, to see them here.
No posts or tags match your search.